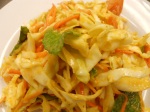
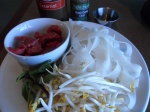
Recipe – Tangy, Nutty Cabbage Salad (GF, soy-free, vegan…)

Lois (one of MIM’s Founding Chef Consultant) mentioned to me a couple of weeks ago that at one of her cooking demos, one of her guests mixed our Coconut Peanut sauce with the Tamarind Sauce and pour the whole thing over rice.  It tasted great!  I did not even think about that combination of sauces could be possible.  Well, I never thought about mixing any of the sauces together since I tend to create the sauces for a specific dish in mind (I know, boring…you will say :-)).  I promised her that I will create a recipe for it.  I did not know what would go well with it but I was eating some cabbage salad – the Vietnamese way – and I thought maybe I can try a different dressing.  You see, Viet people have our own version of cabbage salad that we toss together with some carrots, onions, cooked chicken strips, mint and our famous vinaigrette (which is a mixture of fish sauce, lot of water, fresh lemon or lime, some crushed garlic and chopped chili).   I thought maybe I can make a tangy and more ‘nutty’ salad from the idea above.  I did and I must say the salad was very tasty, ‘nutty’ and different – in a nice way.  It took me literally less than 5 minutes to do this salad.  I think it will be great with cucumber and red bell pepper as well.  I am certain the color will ‘pop’ more.  Here is the recipe.  I hope you enjoy making it.  Let me know what you think!

Ingredients (servings 2)

4 TBSP warm Coconut Peanut sauce (scoop the Coconut Peanut sauce from the jar into a small cup, microwave for 15 seconds)

2 TBSP Tamarind sauce

4 C chopped cabbage (I prefer thinly sliced version so they soak up the sauce much better)

1/2 carrot – julienned

1/2 tomato – cubes

1/4 yellow onion or 2 stalks of green onions chopped into 1-in length pieces

handful of fresh mint or some fragrant herbs

Roasted peanut – ground or coarsely chopped (optional)

Instructions:

  1. Whisk the warm Coconut Peanut sauce with the Tamarind sauce to create your salad dressing.
  2. In a big bowl, toss in the cabbage, carrots, tomato, onion, herbs and the salad dressing.
  3. Toss them using spatula or hands.
  4. Optional – Top with roasted peanut before serving.

If you have some cooked chicken or shrimp, it would be great to add them to your salad!


Leave a comment

Filed under Recipes

Recipe – Tangy Shrimp Pasta


Our daughter Clara enjoys eating spaghetti-like dishes.  We have not had pasta at home for quite a while though.  Since there was no canned spaghetti sauce available in the pantry, I had to come up with a tangy and yummy substitute.  After taking inventory of what I did have available to use, I found the following:  Meals In A Minute’s Tamarind sauce, Meals In A Minute’s Sundried Tomato Basil dip, yellow onion, tomato, shrimp and some fresh lime.  Using these ingredients, I created the Tangy Shrimp Pasta recipe!  Clara loved it and suggested we add it to the Indochine menu and see what our customers thought.  Since Clara has great taste, I decided to write up the recipe.  I hope you and your family will enjoy!

Ingredients – servings 2:

2 TBSP cooking oil (or less)

12 shrimps – de-veined and shelled

1/2 yellow onion – sliced

1 small tomato

6 TBSP Tamarind sauce (more of you like it more punchy)

1 TBSP Sun-dried Tomato Dip

Pinch of pepper

4 C of cooked spaghetti noodles (use 1/2 of the regular spaghetti packet)

Few sprigs of cilantro (optional)

Wedge of lime (optional)

Instructions

1.  Cook the noodle following instruction. Drained and set aside.

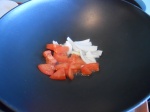
2.  Cook oil in a wok at 375 degree.  Add yellow onion and tomato and cook for 1 minute until they are softened.

4. Add shrimp, Tamarind sauce and cook for 1 minute until the shrimp is cooked.  Add in the Sun-dried Tomato Dip.  Mix everything together for a few seconds.

5.  Toss in the noodle.  Toss in a pinch of peppers and cilantro before serving.  Serve with a wedge of lime for an added freshness.

Leave a comment

Filed under Recipes

Recipe – Hawaiian Pork

This dish was inspired by Traci Hernandez, a friend of MiM consultant, Lois Soule.

Traci described to Lois just how quick and yummy the Hawaiian Pork recipe is!  Traci simply threw together our Pineapple Yaki sauce, crushed pineapple, some Essential sauce and a pork loin.  Traci marinaded her pork loin with Essential sauce, then topped it off with Pineapple Yaki sauce and some crushed pineapple.  Traci then tossed it into the oven to slow bake.  The finished dish was really delicious and everyone in her family LOVED it!

It sounded so yummy that none of us wanted to wait to get the recipe from Traci!  I promised Lois I would create my own version, though I had a sneaking suspicion Traci’s version was juicier since she used an ENTIRE can of crushed pineapple.  You decide how much pineapple you want.  I think pineapple is so delicious and carmelizes well when baked or broiled in the oven.  If you marinade it longer than 10 minutes in our Essential sauce — it would taste even better than when I made this dish.  I marinaded it for about 5 minutes as I had a second recipe to finish.  It turned out great, regardless.  In the future, I would add some chili peppers when baking the meat so the spiciness can be infused more in the meat and the sauce.  Something that sweet, tangy and salty I like to be spicy as well.  It is just my personal preference.

Thank you Lois for telling me about Traci’s dish!  Thank you Traci for the wonderful creation!

Ingredients (servings 2 – 3):

1 lb Pork Loin (can use thicker cut pork chops if you want to – just marinade longer in Essential Sauce)

3 TBSP Essential Sauce (use GF as required)

3 TBSP Pineapple-Yaki (already GF!)

1/2 can of crushed pineapple (I did not use the juice but now that I think of it .. this would be a nice addition)

2 stalks of scallions – chopped

Pinch of dried red chili flakes

Pinch of ground white pepper

Directions:

  1. In a baking dish, marinade the meat with Essential sauce, Pineapple-Yaki, crushed pineapple, scallions, red chili flakes and white peppers for at least 10 minutes.  Refrigerate until you are ready to bake.
  2. Preheat oven to 350 degrees.  Cover the baking dish with foil and bake for 15 to 25 minutes – depending on the thickness of the chops.
  3. This dish will create its own caramelized gravy that is so yummy to eat with rice.

Leave a comment

Filed under Recipes

Recipe – Spicy Green Fried Rice

Just about a year ago, we were at the Food and Gift show, showing off our Meals In A Minute products.  We usually mix up some Basil Green Curry sauce with coconut milk for people to taste.  The coconut milk helps to bring out the wonderful curry flavor in our sauce.  Well unlucky for us … we ran out of coconut milk.  Thinking quickly … I decided to improvise.  I noticed we had some rice left, so I tried something a bit different.  I mixed some of our Essential sauce in with the rice and then added some Basil Green Curry.  This mixture helped our customers taste a little of its’ wonderfully spicy and fragrant flavor.  The texture tends to be a little more ‘silky’ than the normal fried rice because of the reduced amount of coconut milk in the Basil Green Curry sauce.  It is delicious nonetheless.  We sold many jars of the Basil Green Curry sauce as a result of my on-the-fly creation.  If you prefer it spicier … just add more Basil Green Curry sauce.  Fresh basil  works too!  Enjoy!

Ingredients (servings 2)

2 tbsp cooking oil

1 egg

4 C cooked rice (it is best to use rice that has been refrigerated so the grains are tight and your rice will not be mushy)

1 C veggies (can use frozen peas, carrots, corn combination)

3 TBSP Essential Cooking Sauce (use GF version as required)

2 – 3 TBSP Basil Green Curry

Pinch of ground white pepper (optional)

Wedge of lime (optional)

Instructions:

  1. Heat oil in wok at 400 degree.  Crack the egg and stir it just like you would for scrambled eggs.  Continue stirring until the egg is cooked.
  2. Add in the rice and toss together with the egg.  Make sure the egg and rice are mixed thoroughly.  Let it cook for a few minutes and stir it twice.
  3. Add the veggies and toss together with the rice.  Cook them for two minutes.
  4. Add in Essential Sauce.  Toss to mix well.  Then add in Basil Green Curry and mix well.  Turn off heat.  Sprinkle the dish with ground white peppers before serving.

Serve with a piece of lime for some added tang.

Leave a comment

Filed under Recipes

Recipe – Drunken Noodles with Beef

Drunken Noodles is one of the most popular Thai noodle dishes available.  The name “Drunken Noodle” has been explained a variety of different ways.  The explanation I like best is the one that describes the Drunken Noodle dish as so spicy, customers need to wash away the spiciness with beer – enough beer that they get drunk.  It’s an interesting story anyway … not sure if it’s true.

The Drunken Noodle dish is one of the most popular and addicting dishes offered at IndoChine restaurant and I am often asked for the recipe.  What makes this dish so wonderfully delicious?  In my opinion, it is the combination of the wet noodles, the aromatic sauce and the fresh basil garlic/chili mix (added at the end).  All three ingredients work together to create a burst of flavor that dances on your taste buds!  Sound yummy??  It is VERY yummy!

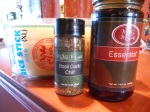
The sauce is the easiest part of this recipe.  We will use our popular Essential sauce (you can use the GF version if you need to).  Wet noodles are not practical for MiM to stock, so I like to replace them with the wider rice noodle.  Rice noodles are gluten-free.  Finally, our GF customers have a dish they can make at home, since it is nearly impossible to order at an Asian restaurant. As of this writing, we do not have any of the extra wide noodles in stock … but we will very soon.  If you are interested in trying them, just let us know and we will order some for you.

Wet noodle problem solved, we still need to track down some fresh basil to create our basil/garlic/chili mixture.  It is not easy to get our hands on fresh basil.  Those of you who want to make the fresh herb mixture, grind all the ingredients together using a 1:1:1 ratio.  It does not need to be pasty, just a few pauses with your food processor is all you need.  It will taste better, I promise.  So, what to do if you don’t have access to fresh basil or don’t want to make the mixture?  Meals In A Minute Basil Garlic Chili spice is a good substitute.  Not perfect, but it will do in a pinch.

Described below is the Drunken Noodle recipe using all of our products.  Since the noodles are not the “wet” variety and the herbs are not fresh … this dish is rated about 80% of its’ “real” authentic version.  It is still a very good and enjoyable dish!  The dish can be enhanced by replacing the dried herbs with fresh.  You can make this dish with any protein you want.  As we often say at Meals In A Minute – our sauces do not discriminate any protein.

Ingredients (servings 2)

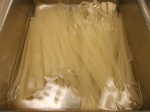
4 C soaked and drained XL rice sticks (soak and drain 1/2 of the dry package will give you 4 C).  To soak the noodle, use hot tap water to soak with lid on for 15 minutes.

2 TBSP cooking oil – suggest lighter-bodied oil than olive oil

1/4 lb beef – cut very thinly and small pieces (1.5 in x 1 in)

1 tsp molasses – optional – if you want the dish to have the toasty sweetness

4 – 5 TBSP Essential Cooking sauce (use GF version as required)

1 TBSP Basil Garlic Chili Spice

1 clove of fresh garlic – crushed (optional)

1 C bean sprout (substitute with thinly sliced white cabbage)

Fresh basil leaves – optional

Fresh chili peppers or dried chili flakes – optional

1 tsp sesame oil

Pinch of white pepper

Instructions

  1. Heat oil in your wok at 400 degrees.  As soon as the oil is hot, add the beef and cook for 1 minute until both sides are seared.
  2. Add noodles and toss together with the beef.  Leave alone for 60 seconds so the noodle can soften.  Turn the noodle once and leave it for another 60 seconds.
  3. Add in molasses, essential sauce, basil garlic chili and crushed garlic.  Toss the whole thing for another 60 seconds.
  4. Add in bean sprouts, sesame oil, fresh basil, pinch of white peppers and turn off heat.

Optional – if you want more spice, add in chopped chili peppers or dried chili flakes.  This dish is great when it is spicy!

1 Comment

Filed under Recipes

Recipe – Curry Salmon in Phyllo Cups

Alright, I know what you are thinking … “Yume is hitting the Phyllo cups AGAIN!”

I was asked to be on KWGN – Colorado’s Own Channel – for January 24th at 8:33am.  January has been a very hectic month.  Meals In A Minute has been busy with new consultants, consultants doing demos (and you know I love doing those demos), and packaging some of our new products.  Since I had so much going on, I did not plan what to cook for the KWGN special. The day before the tv special, I was at Indochine and came upon a few phyllo cups in the freezer.  Then, I spotted some nice pieces of filet salmon.  Ah Ha! Why not make something quick like salmon baked in phyllo cups?  With the Super Bowl coming up, these will be wonderful and quick to make!

I decided to chop up some red bell pepper, scallion and salmon.  I then mixed them together with a bit of the Essential sauce and some Kaffir Lime curry sauce. Hmmm..a good start, but it just seemed to be missing something.   I scoured through the refrigerator at Indochine looking for that perfect ingredient.  I finally decided on my own favorite vegetable:  jicama!!  Jicama is sweet and light – a perfect addition to what I already had.  I tested a few and even gave some to Indochine’s guests to try.  They LOVED them so I decided to do this for the TV special the following day.

To see the TV segment, click on the link at the bottom of this post.

Ingredients (for 30 mini phyllo cups)

  1. 1/2 lb filet salmon – chopped or diced
  2. 1 red bell pepper – diced
  3. 1 small Jicama – diced
  4. 2 stalks scallions – chopped
  5. 1 tsp Meals In A Minute Essential Sauce
  6. 4 tsp Meals In A Minute Kaffir Lime Sauce
  7. pinch of black peppers
  8. 30 mini Phyllo cups
  9. 4 tsp Meals In A Minute Kaffir Lime sauce for drizzling or just extra on the side
  10. Cilantro and fresh Kaffir Lime leaves or lime zest (optional)
Directions
 
Step 1 – Mix ingredients #1 through #7 together in a bowl.  

 
Step 2 – Scoop the mixture into each of the Phyllo cups – be careful not to pile too high.  Turn your oven to Broil at 325 degrees and bake for 5 minutes.

Step 3 – Top with cilantro or chopped Kaffir Lime leaves as desired.  Drizzle additional Kaffir Lime sauce on top before serving.
 
Here is the segment on Colorado’s KWGN – with Tom Green.

Leave a comment

Filed under Recipes

Recipe – Baked Green Curry Fish Paste

I was so hungry for a full-bodied dish that also has a light texture.  I was craving the type of dish I refer to as “no fuss eating”.  A simple, not too spicy dish I can eat with rice, but it also has that kick!  You know…just one of those days.

Since I did not feel like having anything stir-fry today, I decided to grind some tilapia filet with yellow and green onions in the food processor.  I mixed some Coconut Milk and the Basil Green Curry sauce in a separate bowl.  Then I scooped the mixture out of the processor and blended it with the curried coconut mixture.  Finally, I baked this dish in the oven for about 10 minutes.  The result?  Just as I envisioned — soft, full of flavor, perfect with rice and still has bit of a kick!

Ingredients (2 servings)

1/2 C of Coconut Milk

2 TBSP Basil Green Curry

1/2 lb white fish – filet

3 TBSP yellow onion

1 stalk scallion

Pinch of white (or black) pepper

Instructions

  1. In a small baking pan, mix coconut milk and Basil Green Curry.
  2. Process the fish, yellow onion, scallion and white peppers in a food processor until the mixture becomes pasty.
  3. Pour the fish mixture into the baking pan and make sure to spread the mixture so it is absorbed into the coconut/basil green curry.
  4. Bake on ‘Broil’ setting at 350 degrees for 7 minutes.  Make sure the top is not too brown.
  5. Serve with rice or noodles.

Leave a comment

Filed under Recipes

Demo for Karen Clonts in Elizabeth, Colorado

After I did Steve Pappa’s demo (1/11/12), I assisted Karen Clonts’s with her first demo.  Karen joined our MIM family in November and although she was anxious to do her demo earlier … the holidays is a tough time to make anything happen.

I know that when Karen saw only six ladies show up, she was a little disappointed because she invited 10.  I did not say anything to Karen other than assure her the other invited guests can always be invited to her next demo. This kind of thing happens ALL THE TIME in our business.  You can only count on 50% of the invited guests to show up.  As long as you call them back and follow-up, you will get them to the next demo.  The way I look at it is that you get plenty of practice with follow-ups and phone calls (and practice makes perfect) :-).

Karen’s demo was 100% to the script.  We only cooked beef cubes and had a tasting using rice with 6 sauces.  It was the easiest demo I have done to-date (and you know I have done many!).  It was also the most economical demo to-date as there was no alcoholic beverages offered besides water.   She did not have any appetizers, dessert or anything else besides what I listed.  The results?  Karen had 6 guests attend and the average sale per person was $55!  Yes, everyone bought the five-sauce pak with free gift.  Everyone wanted to try out the other sauces, so we asked them if they were interested in hosting a demo for their friends.  Their demo would be perfect to show off the other sauces.  I believe Karen can count on at least two (2) more demos.  I consider that a huge success!  Karen’s upline (Lois) was there to help her with the setup and support.  I believe that a supportive upline is crucial and important to a downline’s success.  It was so nice to see Lois and Karen working together to ensure Karen had a successful and easy first demo.  I left Karen’s house and drove 45 minutes to my home and felt so great!  I can see Karen and Lois being great at this business!

So, Karen is off and running!  She will do her next demo on the 26th.  She is excited and now has more confidence that she can do this on her own.

My wish is that I can be in multiple places at once so I can do EVERYONE’S first demo.  I know…that is not duplicatable, but I so love doing them and wish I could do many more!

Leave a comment

Filed under Uncategorized

Recipe – Green Curry in Petite Shrimp Phyllo Cups

Back in December 2011, I got many requests for appetizers using MIM products.  I came up with about four recipes but was able to take pictures of only two appetizers.  My inspiration this time was phyllo cups.  When I was shopping at Safeway looking for frozen pastry sheets, I came upon the cute little phyllo cups.  Since I have only used phyllo cups to make little dessert cups; I thought I’d give it a try for some savory appetizers.

Our consultant from Elizabeth, Colorado – Lois Soule was on her way to meet me to get some quick ideas for her party’s appetizers.  I also was having a quick meeting with Rose Schmidt – another MIM consultant from Colorado Springs so you can see, I was in a BIG hurry to get the recipe tested, take pictures and so on.  They came out alright and although Rose could not try them as I was using the regular phyllo cups and Rose is GF; she thought the cups look very appetizing.  Lois tried them and I think she really liked them!  To those who need to be GF, Whole Foods has GF phyllo cups.

Although the holidays are behind, Valentine’s Day is coming up soon.  Why not do something nice for your Valentine (and it will only takes you minutes!).

Ingredients:

2 packages Frozen miniature phyllo cups (2.1 ounces each), thawed
2 TBSP Mayonnaise
1 can Corn (13oz)
1 lb Bay or small frozen cooked shrimp.  Chop into small pieces.
1 stalk Scallions (green onion) – use both green and white parts
A pinch Ground Black Peppers
2 TBSP Meals In A Minute Basil Green Curry (Sub with Panang or Yellow Curry if you like)

Directions:

Take the Phyllo cups out of their packaging and line them on a baking sheet.

In a mixing bowl, mix corn, chopped cooked shrimps, scallions, mayonaise and Basil Green Curry and black peppers.

Scoop out the shrimp/corn mixture and spoon into the Phyllo cups and bake in your oven at 350 degree for about 5 minutes.

Remove from oven, top with some fresh cilantro (optional) and serve.

Leave a comment

Filed under Appetizers, Uncategorized

Yume’s first post for 2012

Hello 2012!  I decided to start my first Meals In A Minute blog on a day where snow covers the whole state of Colorado.  I am sitting in my office sipping a cup of Minty Mint tea and typing away!  I am addicted to the Minty Mint tea – it is so good and minty!  Best of all, I don’t get a headache drinking many cups since it is herbal and contains no caffeine whatsoever.

Sorry for digressing …

I am doing my first demo for 2012 today!  Steve Pappa will have his first-ever demo to jump start his MiM (Meals In A Minute) business this afternoon.  I am so thrilled to do his first one for him.  I am ALWAYS excited to do cooking demos for our consultants.  I am so excited to see their enthusiasm and how eager they are to show the world our fabulous products!  After I finish Steve’s, I am doing one for Karen Clonts tomorrow night!  I would be so happy to do demos every day of the week (except Friday, Saturday and Sunday of course)!

My plan for this blog is to make publishing the Food for Thoughts much easier.  So easy for me to load the pictures, write the recipes and publish!  All of our consultants and their friends and families can get to see the blogs and maybe will get hungry reading the recipes and start cooking up a storm!

What I also plan for this blog is to document my inspiration for the next product.  People most often asked me how I got inspiration for the products we have.  Some of them came already done from my wonderful husband’s restaurant (Indochine).  I just need to tweak it a little so we can package them and off we go.  Some of the products are from people who just love the products and some are mere accidents.  My sole inspiration is to create products that are healthy, unique and have great applications in every kitchen.  The rest just falls into place.

I know…this first blog is not too exciting but just like an athlete, a blogger needs some ‘warm-up’ contents before going full-speed.  My goal is to blog often – especially when I complete a new recipe.  See you in the next blog!

Leave a comment

Filed under Uncategorized, Yume's Note